This page is mainly designed for folks on the ZR2 discussion list, to show what mods I have made to my truck. You can join the discussion list by sending the word "Subscribe" (without the quotes) to mailto:zr2@zr2hr.org.
I'd been wanting a bumper like this ever since I saw it on Dave's 4-Runner (shown below as well). The problem was that the only place I could find a bumper like it was at All Pro Offroad, a Toyota specialist that had no interest in custom making a bumper for a GMC. Eventually, I'd had enough. I took some measurments and found out that the specs for the 4-Runner and my truck were fairly close. I then found a welder who would do any necessary modifications, and ordered the Toyota bumper. I got my truck lifted 2" via the Performance Accessories body lift, and then removed my rear bumper to do a fit test. To my surprise (and joy) the width of the mounting brackets was almost perfect for my truck. The only problem is that the holes didn't line up right, and that the body panels were a little too wide for the wrap-around part. Very minor problems in my book.
All I would have to do is drill new holes in the frame and trim the rear body panels, and I was planning on doing the later anyway. At any rate, below you will see some mods of the install and a little explanation of what I did for anyone who cares to add one of these bumpers to their ZR2.
|
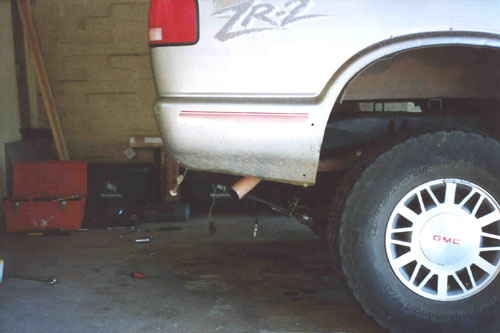
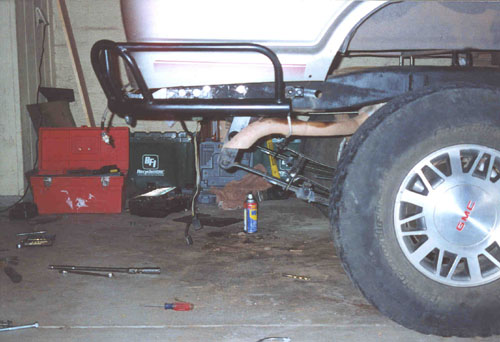
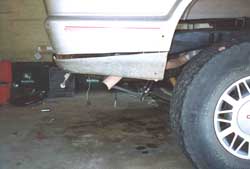
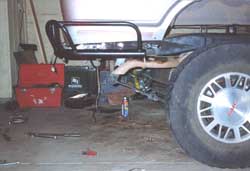
1. The first step, of course, is to remove the stock rear bumper. Remember to unplug the licence plate lights before doing this. If you have a receiver hitch, remove it as well.
|

|
|
2. Remove the spare tire and stow the cable out of the way.
3. Using your T40 torx wrench, remove the support bars from the frame to the bottom of the body panel behind the rear wheel. For those of you who still have your wheel flares, you will probably have to remove the flares. Any modifications regarding the wheel flares you will have to figure out on your own, as I removed mine long ago.
the torx bolts on my truck were very stubborn, and I think that two of them were reverse threaded. Check the threads to determine which way loosens them. I had to cut the right side bar off because I couldn't loosen the torx bolt, even with my breaker bar!
|
|
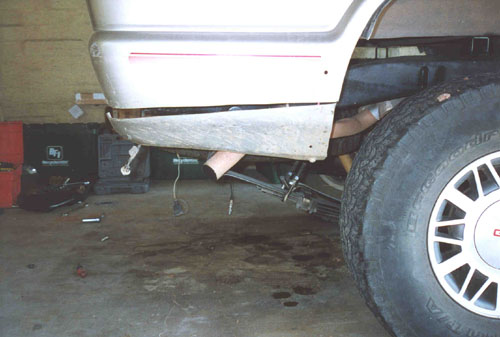
4. You might have to steel yourself up for this step . . . cutting the body panels. I did so without a moment of hesitation, but I'm wierd like that.
I cut mine a little too much towards the front and/or not enough towards the rear. After first trying a more moderate cut, I ended up cutting 10" of the body panel just behind the rear wheel, and tapered that down to 7" where the body panel starts to wrap around to the back of the truck. If I were to do it over again, I think I would trim 9" off the front and 8" off the back to keep a more horizontal line. What I should have done was measure from the ground up instead of measure using points on the truck.
|
One of my goals for installing this bumper was to get it up as high as possible, and get it as close to the back of the truck as possible. I wanted to do this to improve my departure angle when wheeling. If this is not your goal, you can get away with less body panel trimming by installing the bumper lower and further back. You might be able to save drilling a couple of holes in the frame this way as well. Another option is to get the bumper from All Pro that is designed for 4-runners WITHOUT a 2" body lift. I got the bumper designed for 4-runners with a 2" body lift. You will just have to play with things a bit if you want something a little different than what I have done.
5. Using your hands (to protect the paint during the next step), bend the bottom portion of body panel inward.
|
|
6. My next step was to shove the bumper on as far as possible. The bumper bracket wedges quite nicely between the shock mount and the upper part of the frame box. I used my brand spankin' new Hi-Lift jack to help keep the bumper where I wanted it. Clamps or vice grips should work well too. I also used a small sledge hammer to tap the bumper on firmly, using a towel to protect the bumper from damage.
I rotated the wires bolted to the frame on the driver's side towards the front of the truck to protect them.
|

|
SIDE NOTE: I had a scare after doing this. I loosened the bolt, rotated the wires, then kept the bolt loose. Well, shortly after that, I had to back my truck up a bit to get better leverage when pushing the bumper on. But my truck wouldn't start. I was in a mild state of panic, and even checked under my truck to make sure I hadn't accidentally cut something. When I tighted the bolt again, the engine started. I think that one of those wires is a ground for the fuel pump, though it's kind of a strange place for it.
|
|
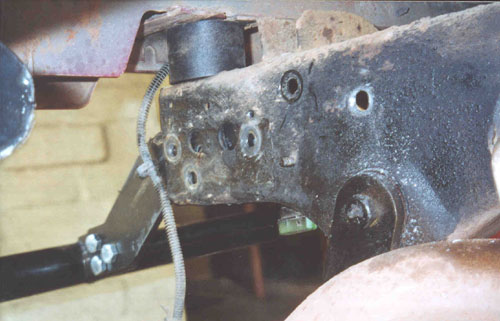
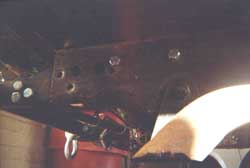
7. I marked the location of the holes on the frame through the center of the holes on the bumper bracket. It seemed to me that the best option was to make holes in the frame to match the holes in the bracket instead of making holes in the bracket to match the holes in the frame. The bracket is made of much thicker steel, and also has a nut welded on to it in one location per side.
I would recommend doing what I did not do: measure your marks before you start drilling. The bumper looked like it was lined up right when I marked the holes, so I assumed they were even on both sides. I was wrong. Fortunately, they weren't off by much, but I did have to move my pilot holes.
I stepped my hole size up using 4 different sized bits. I wish I'd had a bit size between 3/8" and 1/2", as I dulled the 1/2" bit somewhere in the middle of the second hole. It made for some tough drilling on the remaining holes. (Scraping would have been a better term at that point.)
I had to remove the bumper to drill the front-most holes because of the not that is welded to the bracket. In retrospect, I shouldn't have drilled all four holes at the same time. I should have only drilled the front-most holes, bolted the bumper on to those holes, then drilled the rear-most holes through the bumper bracket.
|
|
8. The next step was to put the bumper on and bolt it up. Because the frame on the ZR2 is a smidgen narrower than the 4-Runner frame, the arms of the bracket get pushed out away from the frame a little bit. This created some difficulty when trying to thread the bolt through the welded nut, especially without crossthreading it. To correct this problem, I made the frame hole slightly elipsoid to allow me to thread the nut straight and I did not use the washer to give me more reach on the bolt. I should have gotten two bolts that were 1/2" longer than the bolts that came with the bumper. It does work with the supplied bolts though.
Once I got the bumper bolted on with the front-most bolts, I noticed that my rear holes weren't quite lined up anymore. I should have waited to drill them out until the bumper was mounted on the front holes. I ended up having to move my pilot hole over a little bit which caused the drill to bind up a bit on the edges.
|
|
|
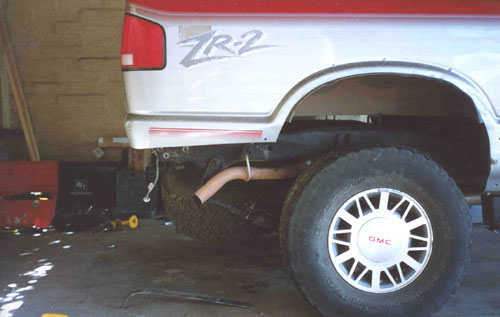
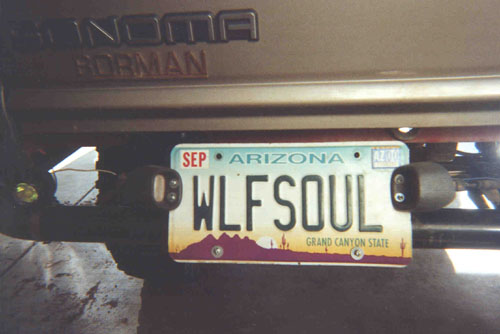
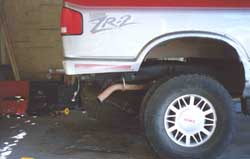
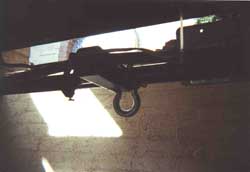
And here is what the bumper looks like installed:
|
|
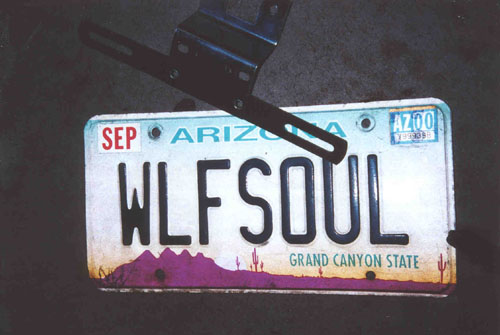
9. With the bumper installed, the only thing that remained was figuring out how to mount my licence plate. I purchased a cheap licence plate holder from Pep Boys and tried a number of different options. I just used hose clamps to attach the plate holder to the main tube of the bumper. In the end, I could have gotten by just as well with a flat piece of metal and some hose clamps, which is basically what I ended up doing, except that I bent the licence plate holder for use with the hose clamps.
To light the licence plate, I removed the lights from the stock bumper, and mounted them directly to the plate. (I hope it isn't illegal to drill a hole in a licence plate!)
|
|
|
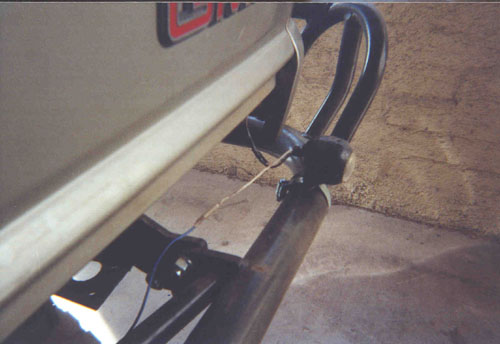
10. Next I painted my new CB antenna clamp black and clamped it to the wrap-around part of the bumper. Slightly longer (1/2" longer) bolts are recommended. I purchased the clamp from Radio Shack.
|
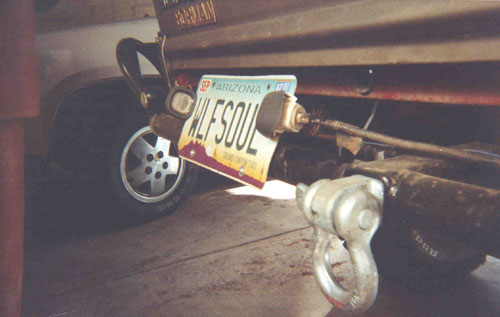
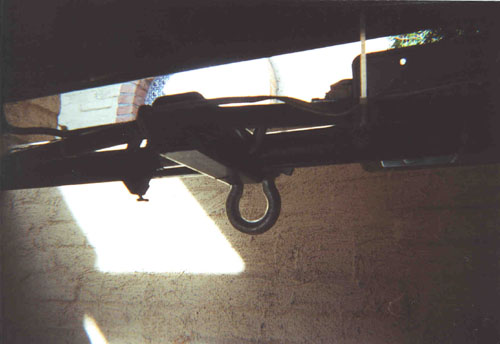
11. After that I put my new Warn reciever shackle bracket on, with a locking pin.
|
|
|
|
12. The last step was to re-install my rear auxiliary lights. The installation was extremely simple, requiring no drilling with the use of hose clamps. The ground wires went into existing holes.
|
|
With the new rear bumper, I gained 10 degrees of departure angle (up to 40 degrees from 30 degrees).
If you're in the Tucson area, drop me a line and we can go wheelin' sometime.
Speaking of which, if you own a Highrider/ZR2/BlaZeR2, or want to find out more about the best little 4X4's around, check out these great sites:
There is also a ZR2 discussion group, which is very fun for talking about our special trucks and in getting ideas, help, and useful information. I have learned a great deal from the list. You can join by sending an e-mail to mailto:zr2@zr2hr.org with the word "SUBSCRIBE" (without the quotes) in the subject line.