Added 2 February 2000, Revised 27 June 2000
This page is mainly designed for folks on the ZR2 discussion list, to show what mods I have made to my truck. You can join the discussion list by sending the word "Subscribe" (without the quotes) to mailto:zr2@zr2hr.org.
THE REASON:
I got tired of seeing ZR2's that look like they sit higher than my HighRider, and I wanted to do something about that. I believe that the problem was that during all the times that I carried a great deal of weight in my truck, I reduced the height of my rear leaf springs. Re-arching the leaf springs can be costly, and add-a-leafs can effect ride quality when the truck isn't loaded, so I decided to go with getting longer shackles for the rear leaf springs. This way I could increase my ride height without effecting much of anything else.
I started out with a set of cheapo shackles that I bought at AutoZone. I have since upgraded to a set of Daystar shackles. They are much beefier, and look much nicer. The part number for the Daystar shackles I have is: KG61002. These are the greasable models. The non-greasable part number is: KG60002. My understanding is that neither one of these shackles is truly designed for the ZR2, but they work great. I highly recommend them.
At any rate, because of the shackle swap, I have pictures of both sets of shackles on this page. The AutoZone shackle installation will be covered first, then I'll follow with some pics of the Daystars.
THE SHACKLES:
A few phone calls to local 4X4 shops about aftermarket shackles yielded nothing, so I went to AutoZone and plunked down $28 for TWO sets of Suspension Solutions shackles, Part #81400. Yep, they're extremely cheap, cost-wise. The aftermarket shackles are actually thicker steel than the OEM shackles, but the OEM shackles are formed, and are therefore stronger. Since the aftermarket shackles were just flat steel, I decided to buddy them up and put two sets on for added strength and peace of mind.
Since I was adding width to the arrangement, I had to go to Ace Hardware and pick up some longer bolts. The kit comes with 5" bolts, so I purchased some 5 1/2" (Grade 8) bolts. The cost of the extra hardware, including nuts for the bolts, was around $8.
WHAT YOU NEED:
- Here is a list of tools that I used to perform the task:
- Crescent wrench
- 22mm box wrench for removing OEM shackles(I think the correct size is 21mm, but I only had a 19mm and a 22mm, and the 22mm worked fine)
- 19mm box wrench for installing aftermarket shackles
- socket wrench (with 19mm socket) for installing aftermarket shackles
- two jack stands
- scissor jack
- bottle jack (I wish I had one of these available, which I will explain later)
- hammer
- screwdriver
- the wrench/screwdriver in the jack kit to lower the spare tire.
THE INSTALLATION:
The first thing you need to do is jack one side (rear only) of the truck up by the frame. I would recommend lowering your spare tire, or completely removing it to make access easier. I would also recommend starting on the driver's side, as it is easier, and you'll learn how to make things easier on the harder, right side.) Because I'm an idiot, I first jacked the left rear quarter of my truck up by the axle. I just wasn't thinking. Jacking the truck up by the axle meant that I was compressing the spring more than normal, so when I removed the lower bolt for the OEM shackle, the spring snapped up and hit the frame. Fortunately, no damage was done to person or truck. IT IS IMPORTANT TO NOTE that the leaf springs on your truck can store up a lot of energy, and can be very dangerous if that energy is released. Try to jack the vehicle up so that the springs are in a completely neutral state (neither flexed up nor down). It is not only safer, but easier as well.
Since there is bound to be at least a little bit of pressure on the shackle bolt, the bolt isn't always easy to remove. In order to get the first bolt out, I had to remove the nut, and use a hammer and screw driver to push the bolt through the bolt hole on the leaf spring. Don't try to bang the bolt all the way out though, because if you do, and there is a lot of pressure being exerted by the leaf spring, it will snap dangerously. It could destroy your screwdriver, and depending on your grip, could smash a finger. Make sure you thread the bolt out for the last part, and make sure you keep your hands clear of the potential path of the leaf spring in case in snaps downward. I put a jack stand underneath the leaf spring pack to ease my mind.
Once the first bolt is out, the spring will go to a neutral position. This will remove any tension from the OEM shackle, and removing the second bolt is a breeze. Once the OEM shackle is removed, start installing the aftermarket shackle. The following diagram is what came with the shackle kit. It doesn't exactly match up with what you'll see on your truck because the shackle mounts to the frame on the outside, not the inside.
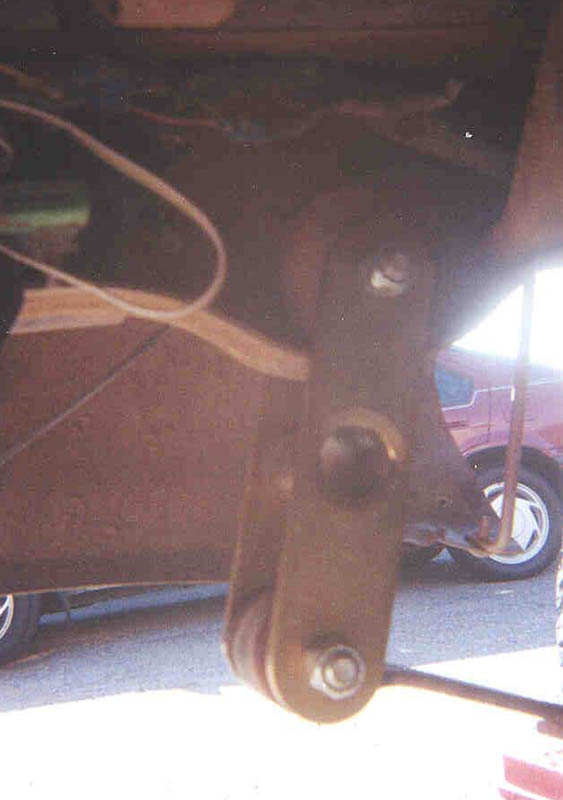
 I had decided to use the middle bolt hole on my shackles, but I didn't want the excess shackle to hang down below my leaf springs. I also didn't want to chop the shackles, because I wanted to keep the possibility of using that third bolt hole. After making sure that the shackles could rotate freely with the excess shackle in the up position, I installed the shackles upside down.
I bolted the new shackles in from the top down. Unfortunately, getting the bolt through the leaf spring proved to be rather difficult with only one set of hands. I couldn't flatten out the leaf spring by hand and get the bolt through the hole. Truth to tell, I'm not even sure if I could have flattened out the leaf spring enough even without trying to get the bolt through the hole. I needed some mechanical advantage. The first thing I tried was to use a hammer to pry the leaf spring down. 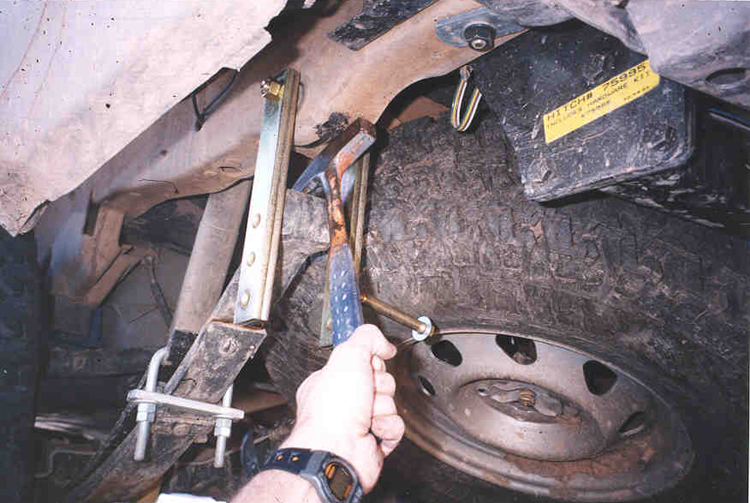
(NOTE: This picture was taken before I decided to flip the shackles upside-down.) I think it would have worked if the head of my hammer had only been slightly longer.
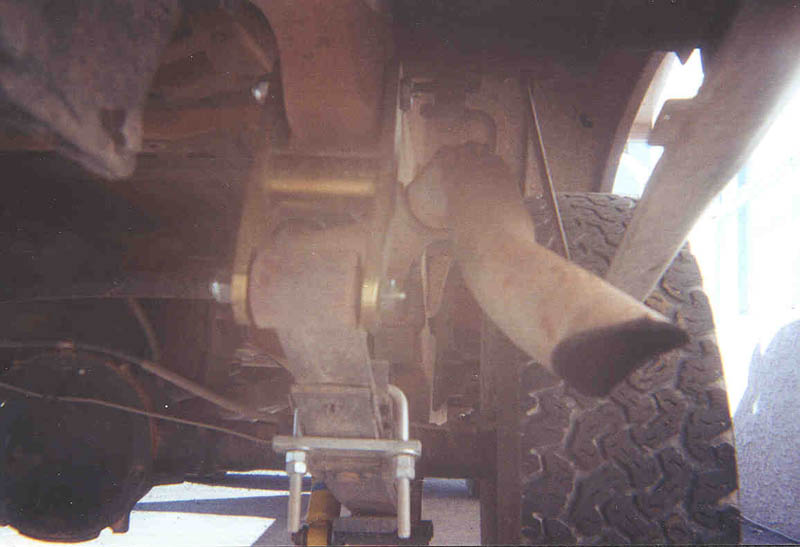
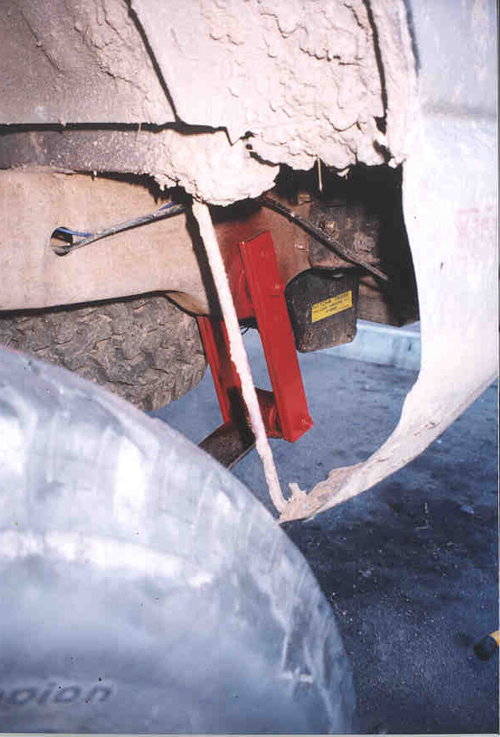
Since that didn't work for me, I had to think of something else. What I came up with, was to use my scissor jack to jack the leaf spring down. Due to the tight confines of the wheel well, this process would have been much easier with a bottle jack, but since I didn't have a bottle jack, I made due with the scissor jack. 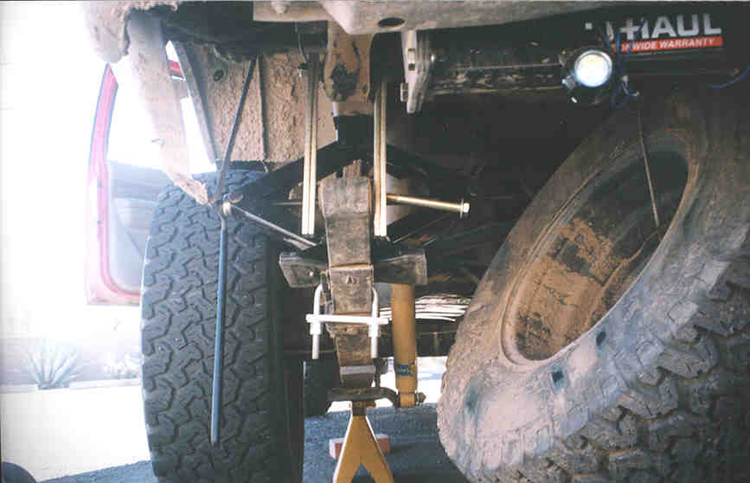
 (NOTE: the exhaust system makes jacking the right side leaf spring even more difficult.)
Once the jack was set up, aligning up the bolt holes was extremely easy. I just tightened everything down, released the jack, and voila!
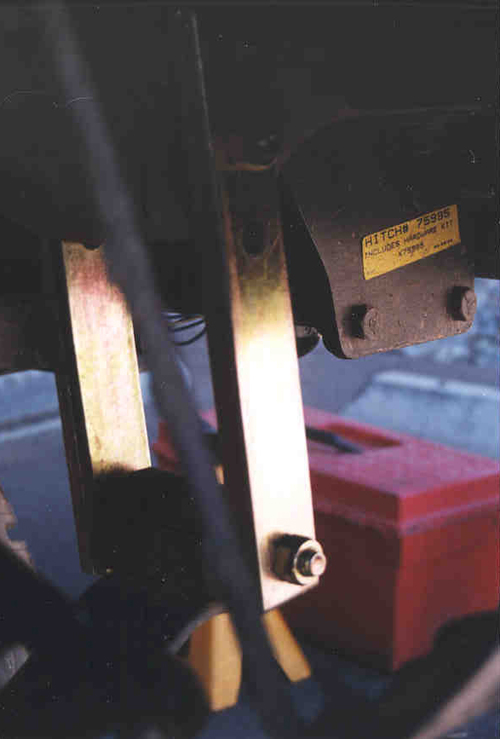
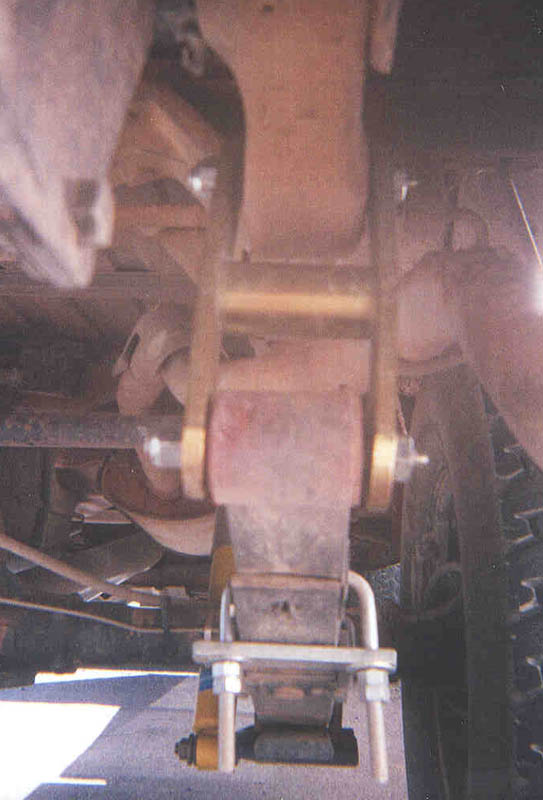
 Here is what the shackle looked like completely installed.
With the truck still jacked up, I went ahead and coated the shackles with spray on rubberizer. The stuff I used was red, which gave the shackles a kind of slick, racing part look, but the color wasn't really of any concern to me. Nor, as you can tell from this picture, was I too careful about the spray-on job.
The right side of the truck, for reasons I don't quite understand, was much easier than the left side, which is a good thing because space is a little tighter on the right side of the truck. After getting the OEM shackle off (this time the leaf springs shot downward), I installed the aftermarket shackles and was able to align the lower bolt holes very easily by hand.
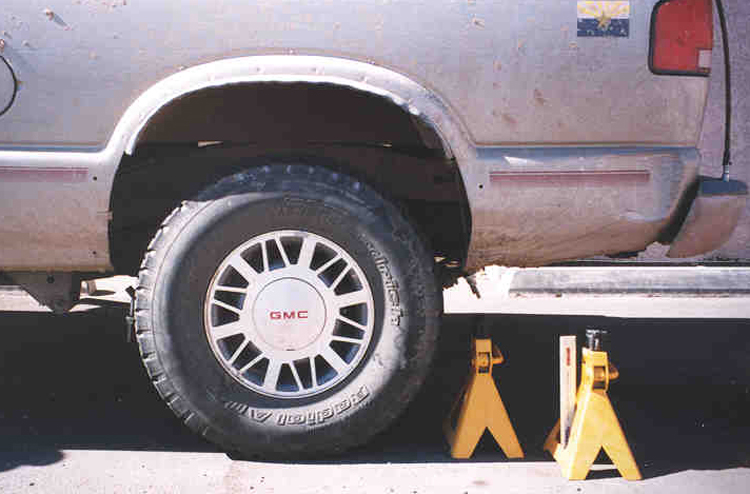
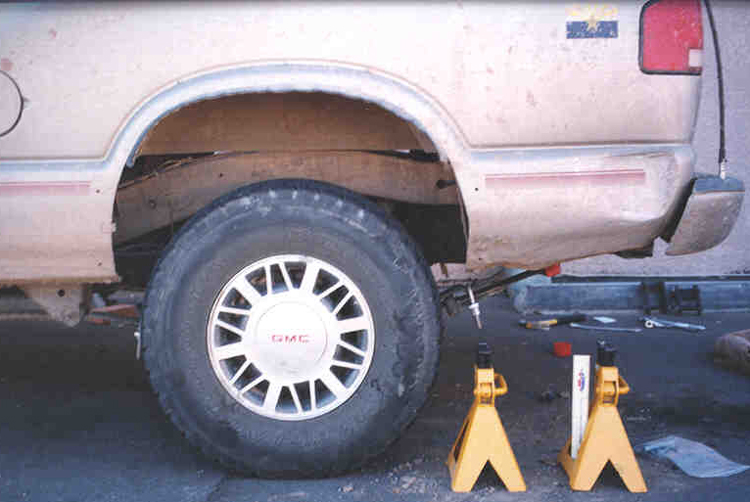 Here are some before and after pics. As you can see, the shackles had a pretty significant impact on the ride height of my truck. I forgot to take a "before" measurement, but using a measurement I took when I installed the Helwig helper spring to my truck, I think it is safe to say that the new shackles raised the back end of my truck up 2-2.5 inches.
AFTER THE INSTALLATION:
The entire installation process only took two hours, even with making a few screw-ups and trying to figure out exactly what I wanted. It is quite an easy installation.
When I took my truck out after installing the shackles, it seemed like they soften my ride out a little bit on the rough stuff. My basis for saying this is that there are some speed bumps in my neighborhood that I never slow down for, so I know pretty much how my truck rides over them. The rear compression on the way down from the speed bump was noticeably softer after I installed the shackles.